Rings Around the Roses
To Conserve Water and Nutrients in the Garden
You might have heard or read about the benefits of making “wells” around rose bushes. The wells you usually see are simply made of soil that is welled up in a circle around each bush, thereby creating a dam that holds the water around the bush. Without a well the water, mulch, and fertilizer usually runs off, away from the bush. If you have heavy soil, these wells work sufficiently, but for only a short period of time. If you have ever had soil wells around your roses, you know that water can cause the wells to deteriorate quickly, and you are constantly remaking the wells, especially if you have light or sandy soil like my garden, or after a heavy rainfall has washed away the soil.
There is a much better way to conserve water, nutrients, and mulch around your roses. They are called “rose rings.” I have been using them around my roses for over 20 years. The rose rings are made out of 3” (available also 4") high brown plastic bender board (also known as flexible landscape edging, or terrace board). It is 1/8-inch thick. You can buy 100-foot, 40-foot, and 16-foot coils of this plastic landscape edging from garden shops and home improvement centers, even on Amazon. I like that this flexible landscape edging is brown because it is inconspicuous in the garden, so they blend in instead of distracting from the beautiful roses.
The rose rings are very easy to make. Here’s how:
1) To make a 22-inch diameter ring for an average-size rose bush, cut about a 6-foot length of the plastic bender board. (For smaller or larger diameter rings, simply cut shorter or longer lengths.) You will need heavy duty scissors or cutters as this material is very thick and hard.
2) Form the strip into a circle, and overlap the ends about two inches. The rings will now be about 22” diameter.
3) Drill four small holes (approx. 3/32” diameter) close to the end of where the strip overlaps, drilling through both ends.
4) Insert a 12-inch length of stainless steel wire through the holes in both ends, lacing the holes like a shoelace. Then twist the wire to secure the ring in a circle. Your rose ring is now complete.
OPTIONS:
Instead of the wire, you can purchase brown plastic stakes made especially for the bender board. Another option is to use a heavy duty adhesive. Some have used brown duct tape to affix the ends, others have used a paste type adhesive. A heavy duty stapler could also be used to make the rose rings.
We prefer the wire method because we can remove the rings for cleaning around the rose bush without having to reshape the ring as you would with the stake. Duct tape might not last as long.
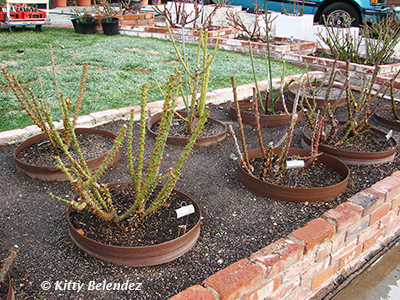
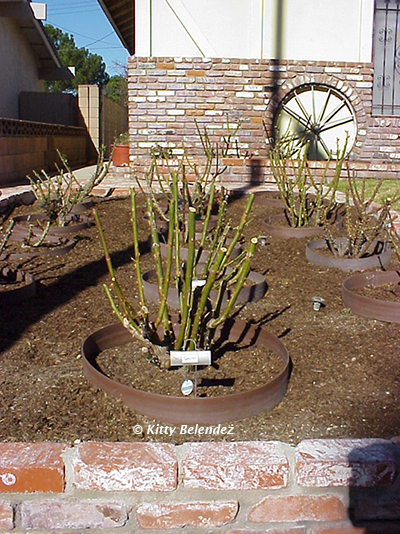
5) Place the rose ring (wells) around the rose bush, and press partially down into the soil to hold the ring in place, so that water won’t drain out.
We find it easier to make and install the rose rings during the dormant period, when the rose bushes have been pruned and they are leafless. Otherwise, we feel it is a bit more difficult to get down on the ground and make the rings around a full bush.
We now have rings around more than 150 of our in-ground rose bushes. The rings are very long lasting, some having been around our roses for over 20 years with no signs of deterioration. They keep mulch, fertilizer, and water in the rings around each rose bush. They are reusable when you replace old bushes.
This brown plastic flexible landscape edging (bender board, or terrace board) is available online at Amazon or at Ace Hardware, and also at Home Depot stores in Southern California. If you cannot find a local supplier, we recommend doing a search on Google to find an online supplier.
Originally published in "Rose Ecstasy," bulletin of the Santa Clarita Valley Rose Society, Kitty Belendez, Editor.
© Copyright Kitty Belendez. All rights reserved.
Photos © Copyright by Kitty Belendez
For questions about Santa Clarita Valley Rose Society, contact: Kitty Belendez